


Pet Photography at Home: Capture Personality, Not Just a Pose

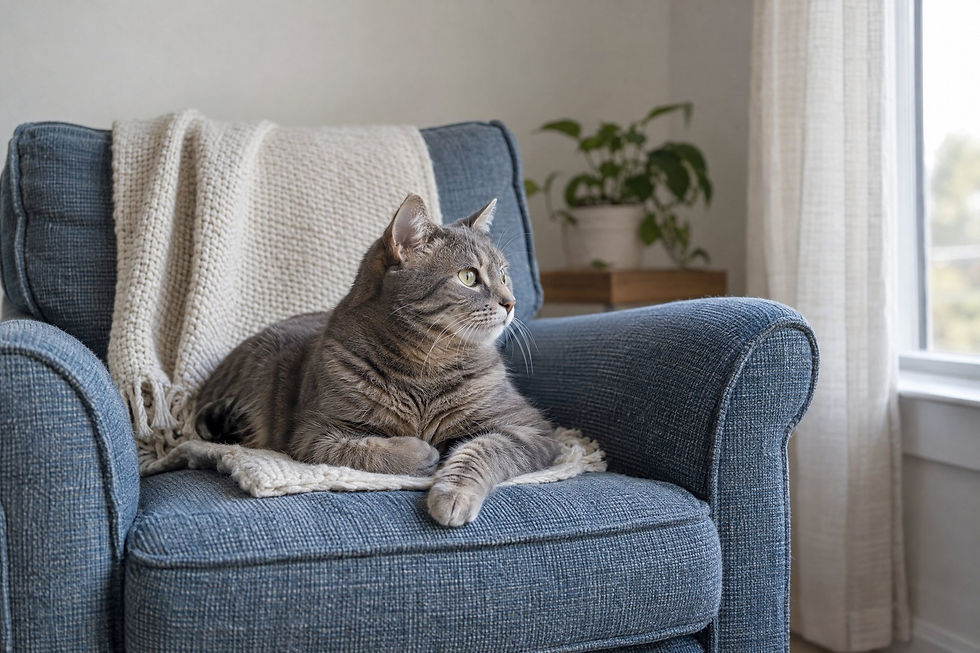
The photographs that stay with us are rarely the perfectly posed ones. They are the tilted head, the watchful pause by a familiar window, or whiskers caught in soft light. At home, a convincing pet portrait begins with observation—not with asking an animal to perform.
With a phone or camera, make room for a real moment, work at eye level, and give the frame as much attention as the face. The goal is a photograph that feels recognizably like the companion who shares your space.
Start where home already feels familiar
Choose a spot your pet uses comfortably: a rug near a window, a favorite chair, or a simple corner with room to step back. Clear visual distractions—loose cables, bright packaging, laundry, or a busy surface directly behind the subject—but do not rearrange the whole room.
Watch the light for a minute. Side light from a window can define fur and whiskers; light from directly behind can turn the subject into a silhouette unless you expose for the face. If it is dim, use another time of day rather than a complicated setup.
Let the session be optional. Allow breaks and photograph the moments that arrive. A pet who walks away has not “ruined” the shoot; it is simply over for now.
Come down to eye level
Eye-level portraits feel more conversational because the viewer meets the animal’s gaze rather than looking down. Canon likewise recommends working at eye level and focusing on the eye closest to the camera when the head is angled (Canon’s pet-photography guide).
Sit on the floor, use a low stool, or rest the camera at the edge of a cushion. Make your position first; then wait rather than continually moving the camera toward the pet.
Try three viewpoints without changing the setting:
Straight on: when both eyes are visible and the background is simple.
A three-quarter turn: to give the face shape while keeping one eye clearly dominant.
A wider environmental frame: to show the pet within a recognizable room, bed, or patch of light.
Look for catchlights—small reflections of window or room light in the eyes—but do not chase them at the expense of a relaxed scene.

Photograph expressions as they happen
Work in short, quiet loops
Have the camera or phone ready before the pet settles. Take a few frames, lower it, and pause. Notice a glance, yawn, tucked paw, or alert look; photograph those transitions rather than trying to hold a pose.
For attention, a familiar sound or a helper beside the camera may prompt a brief glance. Use it lightly and stop if the animal is uninterested. Direct eye contact is not required; a profile toward the window may be more truthful.
Put sharpness where the connection is
For close portraits, place focus on the nearer eye. If animal-eye detection selects the wrong place, switch to a single focus point. On a phone, tap the eye or face area, then take several frames as the head position changes.
Review a few images at full size before the moment passes. Canon notes that animal-eye autofocus and a single focus point can help place focus on the nearer eye in close pet portraits (Canon’s pet-photography guide).
Give the background a job
A good background either locates the portrait or quietly disappears. Scan the frame edges: a lamp behind the head, bright doorway, or high-contrast object can pull attention from the eyes.
A few simple adjustments go a long way:
Turn slightly so a plain wall or soft curtain sits behind the face.
Move yourself, not the pet, to change what falls behind them.
Put more distance between subject and background when the room allows; a wider aperture or longer focal length can soften it (Canon’s pet-photography guide).
Include one meaningful detail—an old blanket, sunlit floorboard, or well-used chair—rather than filling the frame with props.
The best home backgrounds are specific without being busy.
Use settings that support the moment
With a camera, match shutter speed to movement. Canon suggests about 1/200 second for animals that are fairly still and a faster speed when they move more (Canon’s pet-photography guide). Treat this as a starting point: check the image and adjust for the light and motion. With a wider aperture, make sure the near eye remains focused.
With a phone, use the main camera when possible, tap to focus on the face, and avoid digital zoom. In low light, steady your elbows against your body or a doorframe and wait for a stiller moment.
Continuous autofocus and a short burst can help catch a shifting head or quick expression.
Frame with the final use in mind
Leave breathing room around ears, paws, and the top of the head, especially if you may print later. A photograph and its intended print can have different aspect ratios. For example, a 3:2 image needs cropping to fill common 5×7 and 8×10 print formats (Nations Photo Lab’s cropping guide). A slightly wider frame protects your choices later.
Before choosing a favorite, ask: Is the eye clear? Does the background support the mood? Does the expression feel like a real moment?
A small home photo challenge
Set aside ten minutes in a familiar room. Capture:
one eye-level close portrait,
one image that includes a favorite resting place, and
one unscripted expression or gesture.
Choose the frame that feels most like your pet, not necessarily the sharpest or most symmetrical.
The takeaway
Patient pet photography at home is less about getting a pose than noticing the relationship between face, light, and place. Work at eye level, simplify the background, and leave room for the expression that arrives on its own.
What everyday detail—a chair, a window, a blanket, a watchful look—would make a portrait of your pet unmistakably theirs? For questions about Suzanne Claire Studios’ portrait work, you can get in touch here.
Further reading
Canon: Document your pet's life through photos with pet photography tips — eye-level composition, focus placement, autofocus, shutter speed, and background blur.
Nations Photo Lab: Your Guide to Cropping Photo Prints — how differing print proportions can crop a photograph.


Comments